This is an after-action report of a first solo playthrough of Trevor Bender's Desert Victory which was published in the latest C3i magazine.
The rules introduction gives a helpful snapshot of the sort of tactical decisions that may emerge:
Geography is paramount: should one stick to the coastal road and its readily available Depot Towns, or strike-out into the interior in an end run to turn the flank on an opponent? Also, easily negated Zones of Control mean that frequent freewheeling battles can occurs as was often the case in the Western Desert Campaign, where front lines were regularly penetrated or skirted by mobile formations.
Turn 1
An uneasy stand-off in the summer of 1940. Low troop numbers at the Libya - Egypt border with the battle for North Africa about to ignite.
 |
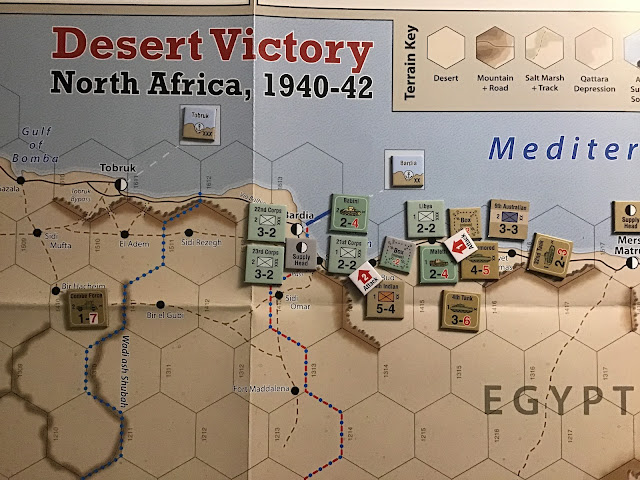
The Italians begin with the initiative. In Turn 1, both sides have two supply markers, allowing two actions. The Italians have the initiative and I decided to cross into Egypt. I don't think this a wise move. The Italian force is weak (not that the Allies are especially strong to begin with) and crossing the boundary also takes them across a supply line (the dotted blue line). This takes them beyond their 'Supply Head' in Bardia. In battle, if your line of communcation back to your supply head crosses a supply line you lose a strength point.
Both sides then use the engineering action to fortify ('Box') their defensive positions (the -2 on the marker denotes a two column shift on the combat results table). For the Italians, this perhaps gives some logic to their push into Egypt in that it creates a defensive buffer. For the the Allies, I can't now see the point. They would have been better off using the action to move / attack, rather than create defenses they are unlikely to need.
More aggressive intent is shown by the British 4th Tank Brigade, which moves off-road into the desert, perhaps looking to push west.
|
 |
In a learning game, this looks like the Italian foray called the British bluff forcing them into a cautious stance that was unjustified.
|
Turn 2

|
////////mjkjl///////The
The first reinforcements arrive, positioned in or adjacent to their side's 'Supply Head'. These are located the furthest forward controlled depot town which can trace a supply route back to El Agheila (Axis) or Alexandria (Allies). The Allies move into position to attack at Sidi Barrani but may still lack the numbers for it to make sense. Meanwhile, the Combe Force flying column use their generous movement capabilities to start flanking the Italian positions. |
 |
Italian supply shortages means the Allies can move again. The 4th Indian pin potential Italian support around the Gulf of Solum, allowing the 6th Australian and 7th Armoured to hit Sidi Barrani at favourable odds.
|
 |
Sidi Barrani falls but the Italians, disrupted as they are, manage to retreat in reasonable order.
|
 |
| Sensing the futility of holding any gains in Egypt, the Italians pull back to ensure Tobruk is defended. |
 |
The Allies push on and establish a force to attack Bardia from the east, with the 4th Tank Brigade offering support from the south of the town.
|
 |
It's another Allied victory but once again not a decisive one. The Babini Brigade and 23rd Corps are forced to abandon Bardia to Commonwealth forces but still present an ongoing obstruction along the vital coastal road. However, the Combe Force has placed an un-negated zone of influence across that road, west of Tobruk. The Italian lines of communication and supply are in serious jeopardy.
|
 |
1940 comes to a close with the Allies pushing towards Tobruk, with the Italians scrambling to protect their lines of communication. The Allied supply head has moved forward to Bardia but events on other fronts may be about to stymie any future progress.
|


Comments
Post a Comment